Digital Impression Combination Case
by Daniel C. Delrose, DDS
Download PDF Version With Clinical Case Images
Case Overview
A 56-year-old female presented for a full comprehensive exam, with no chief complaints. A full review of her medical history revealed no medical issues and no known drug allergies. Her dental history included a failed endodontic treated tooth #29 thirty years ago. The endodontic file separated in the canal and a crown was placed; within a month, however, the tooth was infected again. The tooth was removed with the fractured file still present in the mandible.
As an aside, as the tooth was being extracted, the forceps slipped and “chipped” the incisal of tooth #8. A fixed partial denture was initially placed 25 years ago, then redone ten years ago. The patient had not been to the dentist since this time.
A full dental examination was completed, including a CBCT scan with the CS 9300, a full series of intraoral radiographs with the RVG 6100; intra- and extraoral photographs, hard tissue examination, and a soft tissue examination using the VelScope. Recurrent decay was noted on the mesial of #4, distal #28 and mesial buccal #30, and all other hard and soft tissue structures were within normal limits.
Treatment
Tooth #4 had recurrent decay, and a CS Solutions Vita Mark II crown was done at her next appointment (Fig1). Feeling confident again in modern dentistry and the technology of the CS Solutions, she scheduled an appointment for an implant in the area of #29.
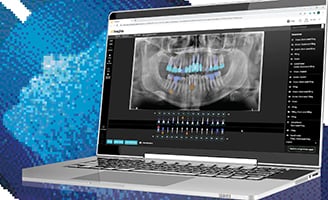
Utilizing the CS 9300 and Digital Imaging Software, an implant was planned for the area of #29 (Figs 2 and 3).
The fixed porcelain fused to metal partial denture was removed, a post was placed in tooth #28, and a buildup was performed on the mesial buccal of #30. A BioHorizons 3.8mm tapered internal implant was placed as planned using the CS 9300. Next, a temporary fixed bridge was placed, and the patient was asked to return in ten weeks for a final impression (Fig 4).
Ten weeks after placement of the implant, the CS 3500 intraoral scanner was used to obtain a digital impression. The advantages of digital impressions are an increase in the preparation accuracy, more ideal fit, quicker turnaround time from the lab, and an overall saving especially with implant restorations. When using a digital scanner, fewer analog materials are need for the impression and fabrication. The CS 3500 is lightweight and comparable to an intraoral camera; not tethered to a laptop but completely portable and intuitive. This means that there are no changes that must be made to the workflow—rather, the assistant hands you the scanner instead of the impression gun. One other advantage of the CS 3500 is that the digital impression takes less time than the analog (rubber base) impression.
An opposing impression was taken by the dental assistant (Fig 5), and the temporary was removed. Using light infiltration in the area of the implant, the implant was uncovered and a healing abutment was placed. Retraction was facilitated with the diode laser and the preparations were scanned (Fig 6). The best aspect is taking the bite–three more pictures, and you see exactly how the models will be mounted virtually (Fig 7).
The healing abutment was removed and the scan abutment placed. The easy “cut tool” was used to erase the healing abutment, so all that needed to be scanned was the scan abutment. The workflow was directed by the CS 3500 and its acquisition software (Fig 8). Next, the scan abutment was imaged and the software did the rest (Fig 9).
The healing abutment was initially placed to show the lab the gingival contours wanted for clinical parameters of the custom abutment. The software was then used to refine the digital impression and show the model (Fig 10 and 11). The refined model was saved as a STL file that could be electrically sent via a HIPPA-compliant portal, which is also part of the CS 3500.
In less than two weeks, the dental laboratory returned printed models with the custom abutment and three full-coverage crowns (Figs 12 and 13). The abutment and restorations were dry fitted, the custom abutment was torqued to 35Nm and all the restorations were delivered (Figs 14-16).


