CLINICAL CASE: CS 9300 and CS 3500/CS 3600
by Dr. Bart Silverman
 Introduction
Digital dentistry has provided a new level of exactness from implant planning and placement to the ability to sculpt gingival tissues prior to fabrication of a final prosthesis. The following case studies demonstrate two ways to prepare soft tissue emergence profiles prior to taking the impression for the final implant crown fabrication.
Workflow with a Surgical Guide
In the first case, a 49-year-old female presented to my office for replacement of her mandibular left first molar. Tooth #19 was removed and, at the same time, the socket was grafted with mineralized cortical cancellous bone and covered with a cytoplast membrane. The area was allowed to heal for four months.
Scanning: Intraoral and CBCT
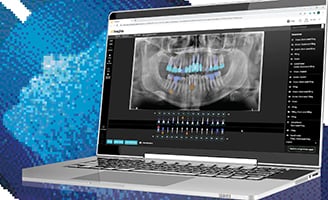
A CS 3500 digital impression and a CS 9300 CBCT scan were obtained. Both files were sent to ROE Dental Labs in Independence, Ohio.
3Shape’s Implant Studio software was used to plan a surgical guide and their Dental Design system was used to fabricate a customized gingival former.
The gingival former was milled in PEEK acrylic material.
Implant Placement
Planning a surgical guide and fabricating a customized gingival former allowed guided surgical placement of the Biohorizons Tapered Internal 4.6mm x 10.5mm implant and insertion of a customized gingival former. At the time of initial implant placement and healing, we could start contouring the gingiva to allow for an emergence profile of the final crown, which could mimic the natural emergence of a crown at the gingival margin.
Workflow with a Scanning Body
In the second case, a 52-year-old female presented to my office following the removal of a second deciduous left molar by her general dentist. As no succedaneous tooth was present, an implant was chosen as a viable option.
Implant Placement and Digital Impression
Thommen 5.0mm Element Implant was placed in tooth #20 with an insertion torque greater than 35 ncm. At the time of implant placement, a scanning body was placed and a CS 3600 scanner was used to take a digital impression of the area.
A traditional healing abutment was placed.
The wound was closed and the files were sent to ROE Labs, where a titanium customized milled abutment was placed and fabricated.
Abutment Placement
The patient returned to our office within 48 hours and the abutment was placed allowing the contouring of the gingival tissues during the implant osseointegration process.
Conclusion
The two separate workflows demonstrate how intraoral digital scanning allows the fabrication and placement of customizable healing abutments—the benefit of which allows the contouring of the gingival tissues during the osseointegration process. By sculpting the tissues to more closely resemble the natural contour of the gingival architecture, we achieve better esthetic results for implant patients.
To learn more about Carestream Dental’s CBCT imaging systems, go to carestreamdental.com.
Download PDF Version of Case Study
Contributors

Share


